
 Rated 97% on GoOverseas!
In this lesson, we’ll be looking at how to set up your workspace for teaching online.
With teaching online you might think that you can just turn your computer on, sit down, and go. While that was once the case many years ago, nowadays online tutoring companies expect you to make some preparations.
Here’s some information on what you’ll need to consider.
Where to teach from
First, you’ll need to find a suitable space in your house which can become your ‘classroom’. It doesn’t need to be a whole room, but you’ll need to find a clear wall or corner to begin with.
Make sure that it has plenty of light, clear walls, a desk to place the computer on, and that it isn’t too noisy.
Find a space which has:
- Lots of light shining around the room, and on you (without shadows).
- A clean back wall or corner with two clean walls.
- A table or desk to place your computer on.
- Some space to move around in – you shouldn’t be pinned up against the wall.
Avoid spaces with:
- Echoey acoustics (use blankets, foam from a DIY store, cushions etc. to dampen the sound).
- Bright light shining into the camera.
- Highly reflective surfaces or walls (cover them if possible).
- Visible windows, doorways, corridors, or open spaces which could allow distractions to come into the video.
This space doesn’t need to be permanently devoted to teaching, but it should be available during your teaching hours each day.
Decorating your workspace
Next, it’s time to decorate your classroom (woo!).
Just like we covered earlier in your TEFL course, it’s important to stage your classroom in a way which aids you as a teacher during the lesson, while also keeping the attention of your students.
With online teaching, you need every little bit of help to engage with your students, and plain white walls aren’t going to do much for you.
Take a look at all of the bright, colorful, and age-appropriate decorations on Vivian’s wall below:
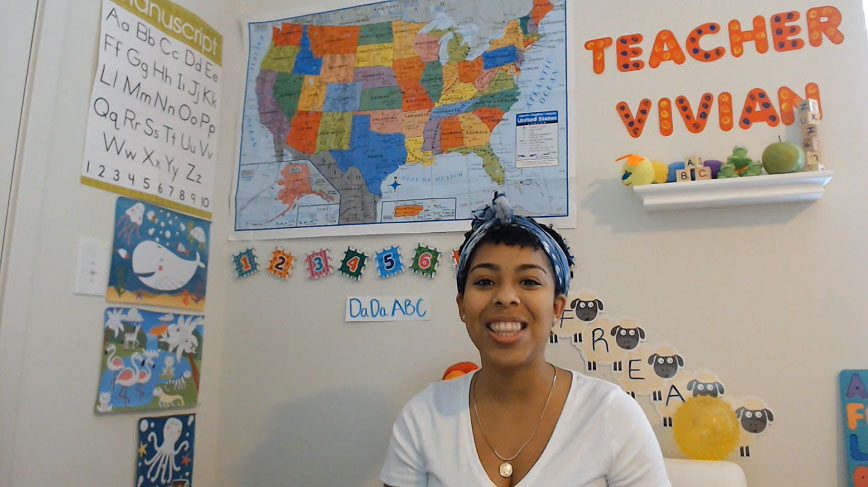
Vivian has gone to great effort to decorate her room with lots of useful materials.
Let’s take a look at some of the different items and how they can be useful:
Maps: Having a map of the world, or your home country can be a great decoration to put on your wall. It can be great for starting conversations, pointing to, and for displaying some information about who you are. Many students (or their parents) will hope to go overseas at some point, and this can be a great way of building a closer connection with them.
As a pro tip: try to get a laminated map if possible, as you’ll be able to draw on it to circle your hometown, or draw a line between your location and your students’.
Numbers & Letters: Having brightly-colored numbers can be great for eye candy, and can also be a useful aid during your lessons. When teaching to count, or when going through repetitions, you can easily point to these numbers. Letters are also great for spelling out your name (or your student’s name). Building a rapport with them will help to ensure future bookings.
Pictures: Colorful posters are great for catching the attention of your students. Animals, landscapes, cartoon boys/girls are great paths to go down.
Whiteboards: Having a whiteboard, or a posterboard can also be a great addition, as you’ll be able to draw pictures and words on it during your lessons. You can also prepare for any tricky topics by writing things down before your class.
As another pro tip: magnetic whiteboards can be useful for easily pinning flashcards or objects onto the board during your lesson. If you don’t have a magnetic board, you could use sticky tac, and just make sure to warm it up in your fingers before your class so that it’s ready to stick.
-
- Colorful letters and numbers
-
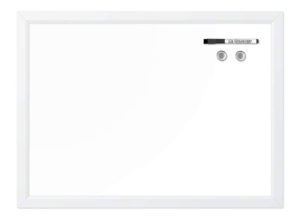
- Pin-up whiteboard
-

- Laminated world map
After getting your decorations, you’ll want to think carefully about where to place them.
Consider if you’ll prefer to sit down or stand up. You’ll want to place your decorations around where you’ll be positioned so that they can be clearly seen (not behind you).
Are you left-handed or right-handed? If you’re right-handed but place your whiteboard on the left side then you’ll need to twist around (turning your back to the camera).
Final adjustments
After you’ve set up your classroom decorations you’ll want to switch your camera on and check how things look.
Ask yourself the following questions:
How’s the lighting? If things are a little too dark you might need to add some extra lamps behind the camera to light up your face. If there are big shadows on the wall then you might want to put some lamps on the floor.
How’s the framing? Try to position your camera so that you can fit 1ft of space either side of you. If you’re using a laptop which you’ll move around after your lessons, then you can get the positioning just right, and use small tabs of tape on the table to mark out the corners of the perfect spot.
How’s the height? You’ll want to keep eye contact with your camera while teaching, and if your camera is too low it could soon give you a stiff neck. If you have any old shoeboxes lying around, you can take to place your laptop ontop of one and see if you can get the camera to meet your eye line.
Off-setting your costs
Getting started with teaching online will involve some initial costs. You’ll likely need to buy some decorations, and as mentioned in the previous lesson, you may also need to invest in a webcam/headset/laptop.
But fear not! In most countries, you can collect all of the receipts for the items which you’ve purchased, and offset these costs when filing your yearly taxes.
We have a guide for filing US taxes as an online teacher here: Filing taxes while teaching online and while the process will vary with different countries, you’ll usually be able to write off a large part of these costs against your taxable income.
Conclusion
By following these pointers, you’ll be able to set up your classroom in a way that’s both comfortable for you to teach in, and engaging for your potential students. It will also signal to potential employers that you’re the kind of teacher which they’re looking for – prepared, dedicated, and fun.
In the next lesson, we’ll be looking at how to select and use props during your classes.